Sunday, June 13, 2010

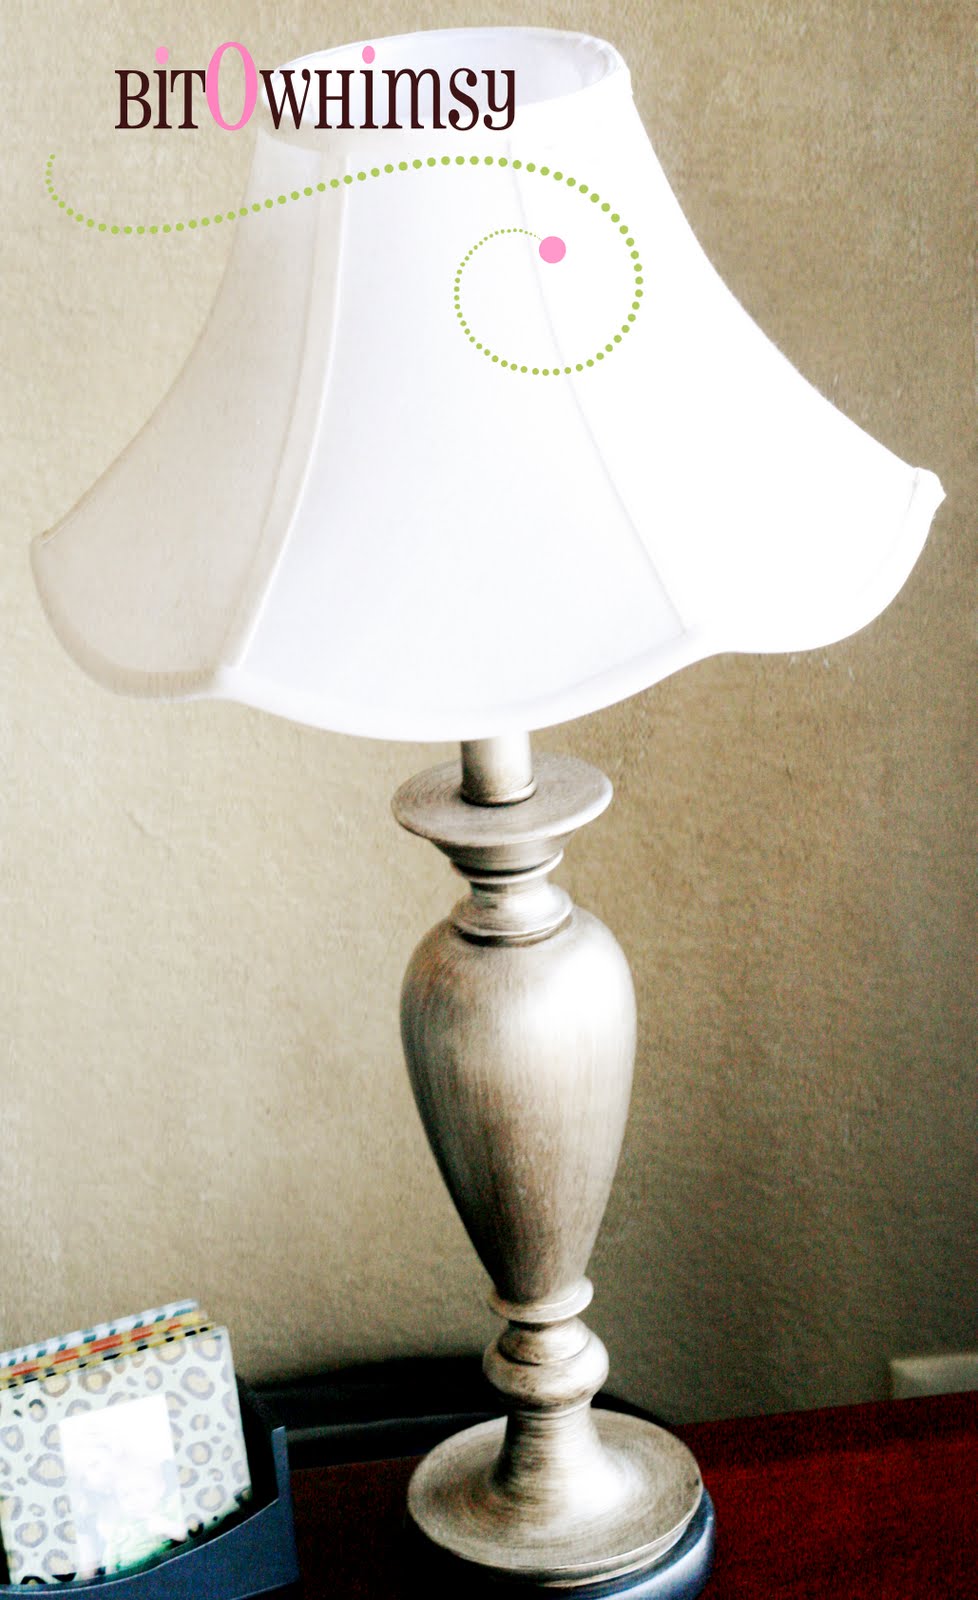
Revamp Lamp

Hello!  I just wanted to share a fast idea for Sunday.
I am not going to lie… I didn’t really come up with this idea. I saw it in a  idea book at the craft store. This certain store wouldn’t let me use my 50% off coupon on it so I left it. GRRRR, I am a bargain shopper!
It is super simple to take this


To this!
All you need is a few bouquets of fake flowers, some brads and a hot glue gun. All you do is pick the flowers apart from all the plastic pieces, stick a brad in the center of your flower and hot glue it down to your lamp edge. Do this all the way around and you end up with a sweet, pretty, girly lamp :)
Happy Sunday!

UndertheTableandDreaming

Tuesday, June 8, 2010

A Few More....

Another round of cute covers! They are really fast and fun to make, I can’t get enough.
This is my little guy in a foggy cover. It’s strange he smiled so much for me; he is teething and has been HORRIBLE all day long. He is finally napping. Thank goodness!
The details are all cut from felt and sewn on.

Lacey Frills
I had to try one with all lace… very simple… pin and sew on a few rows! So feminine and pretty!

Polka Dots

Another for the boy!! Horary! Various sizes of dots were cut from felt and sewn down.

I hope someone gets a kick out of these besides me :) I seriously have no one to wear them… I am just making them. I don’t even have the time to make them but somehow I squeeze them in. I am nuts! Enjoy!

Monday, June 7, 2010

A Little Baby Love

I have so many of my wonderful customers send me pictures of their babies wearing my hats. I have decided to start sharing them on here to spread the baby love. Maybe it’s just me but I love a good baby photo. I hope you do too! Thank you so much to all the mommies and photographers who allowed me to post their sweet photos!

Christina Photography  in Blue Newsboy

Julie's Twins in Bubbley Twin Set

Little Mister in Tadpole

Cherie's little girlie in an all white bow hat.

If you have a photo I can share send it to me at jacylechtenb@msn.com!

Sunday, June 6, 2010

Diaper Cover Variations

So I have become OBSESSED with these diaper covers! I have made a bunch more in the past couple days and had to share a few today. There are so many different things you can do, checkout some of my ideas….
Knit Ruffles

You can cut strips from old knit tee shirts and gather them to create ruffles without worrying about the edges fraying! Tack on a cute bow for even more cuteness.

Bloomin Bum (NO SEW)
Not a sewer, not a problem! Grab a few fake flowers and take them apart then hot glue them onto your bottoms layer by layer. Viola!

For the BOY
I had to figure out something for a boy since there are no baby girls in this house! I purchased the funky pom pom edge from JoAnn and simply pinned and sewed them on.
I will be back with more ideas later!
Happy Sunday :)

BOGO SALE


For a limited time I am offering BUY ONE GET ONE 50% OFF
Purchase ANY item in MY SHOP and get your second item at half price. ***Refund will be issued via PayPal. Second item must be of equal or lesser value**
If you have any questions please feel free to ask :)

Friday, June 4, 2010

Ruffle Bum Diaper Cover Make N Take

This cutie is a PERFECT accessory to hide the ugly/boring diaper during photo shoots! This one isn’t very hard to make and took me about an hour or so. If you don’t want to make your own ruffles like I did you can use only pre-gathered eyelet lace or frilly lace… use your imagination :) I will share more ideas for covers this week since I am having so much fun with them. I hope this sparks your creativity! Enjoy!

Supplies:
• Old pair of baby bottoms (These usually come with baby dresses… I got mine at a thrift store for $1 per pair)
• Pre-gathered eyelet lace (Mine was about 1 and 1/4 wide)
• Fabric

1. First you will need to measure across the back of your bottoms.
Mine measured 12 inches. REMEMBER THIS NUMBER you will use it a few more times.  Next I DOUBLED that measurement for my ruffles so I cut 24 inch strips of fabric in 3 inch wide sections. I used three of these for my bottoms.
Cut your pre-gathered eyelet lace to match your measurement plus an inch or so to turn under for a clean finish. I cut mine 13 inches and used three of these.

2. With WRONG sides facing fold your fabric in half and sew a gathering stitch along the entire strip. Repeat with your other strips.

3. Pull your string to gather and make a ruffle. Gather to match your bottom measurement plus an inch for turning under to make a clean finish.

4. Pin your ruffle straight across the back of your bottoms.  I found it was easiest to start at the bottom and work your way up. Sew it down. Don'f forget to tuck the ends under for a clean finish.


5. Pin and sew your eyelet above your ruffle. I sewed mine onto the top of my ruffle but you can play around and see what works best for you… it all depends on how wide your eyelet is. Again turn your ends under for a clean finsh :)

6. Repeat alternating ruffle strips and eyelet ending with eyelet for a clean finish.

So dang cute! I tried to get a shot of him crawling in it but he was too fast.  Just so you know it does look extremely cute on a crawling baby!
Have fun!
For more ideas check out THIS post and THIS post.

UndertheTableandDreaming
The Girl Creative

Sunday, May 30, 2010

Giveaway Winner Is......

Here is a little something I made using my color craving.
I love the way it turned out! The colors, the feather and the pearls are just so pretty to me!
I wish I had a little girl to try it out on.  I don’t think my boys appreciate modeling girl stuff all the time so I will spare them the torture today.

As for "Smitten"
The random winner is--

breedwoman she said...
I LOVE pink and green but i've been loving bright yellow with EVERYTHING lately!
May 26, 2010 12:07 PM
(go ahead and email me the size and your address to jacylechtenb@msn.com and I will get it made and sent!)

I think pink and green is certainly at the top of my list too. I even had them as my wedding colors.
My Wedding Cake me and my mom made!

Have a beautiful Sunday!

Wednesday, May 26, 2010

May Giveaway!

Hello all! Sorry I have been so absent lately.
I am finally here with May’s giveaway! This month I have selected “Smitten” to giveaway. Winner may choose the size.

Photo by-Jennifer Bahn

Photo by-Amanda Cutler
I love this hat because of the cute color combo. Pink and brown seems to be very popular these days for little girls. I have also been into yellow/gold, aqua and brown... I have been wanting to make something in those colors for a while now.  To enter simply leave me a comment on this post with YOUR favorite color combo and be entered to win. You can leave an email address as well if you want me to contact you if you win. If not make sure you check back here after the contest ends to see if you won. A random winner will be picked on Sunday May 30th.
Good Luck!!

Sunday, May 16, 2010

Ryker's Pirate Party

It’s hard for me to believe that this…
has turned into this…
in a mattter 4 years!
To celebrate his big day we had a pirate party and invite all his little cousins.

The whole pirate theme was perfect! We tattooed all the kids, played pin the patch on the pirate (hilarious with them all being 4 and younger), and had a treasure hunt.
Here are some of the details you might get an idea or two from…

I decorated all of our shirts. Ryker’s was all fabric appliqués pieced together and ironed down. West’s shirt was made from a cue shirt I found at a thrift store. The size was too big and the color was wrong so I cut the pirate out and sewed it onto the blue shirt!

For the treasure hunt I bought a wood box for JoAnn craft store and paited it with brown acrylic paint. I drew and colored ten different “clues” for the little kids to find around the house. They LOVED it, some cried when they didn’t get a turn to open the clue but they still had a lot of fun with it I think!

Inside the box I had jewelry, toys, candy and pirate things. I made all the girls these cute bracelets using THIS tutorial for the band and iron on skulls from Wal-Mart.
So cute!!

The cake... I can't even eat it I am so sick of looking at it!

A simple wall hanging for decoration :)

HAPPY BIRTHDAY RYKER!! XOXO

Sunday, May 9, 2010

Mothers Day

My mom in 1973!
Who ran to help me when I fell,
And would some pretty story tell,
Or kiss the place to make it well?
My mother.
~Ann Taylor

 Happy Mothers Day to all you mommies out there!