Hello! I am so excited to share my first ever “Make n Take”. I LOVE browsing blogs for cute ideas and tutorials so I thought I should share some sweet ideas with you as well!
I ADORE bow ties for my little boys. They make such a great photo prop! I bought a pattern a little while ago that you actually tie onto the kid and my boys HATE them… it is pure torture to them as I tie it on. I have crochet a couple too but I know that most of you don’t know how to crochet so I made a simple sewn version.
You will need:
• ¼ to ½ inch wide elastic (I used 12.5 inches of ½ inch elastic for my 8 month old… the elastic stretches over his head great, it's not tight at all on his neck and looks best under a collared shirt.)
• Scrap Fabric (I used flannel because I like the bright color and design but cotton would work great too)
• 7/8 or 1 inch wide ribbon ( 3.5 inches long)
1. To begin cut 2 rectangles from your fabric. My bow tie was 3 ½ by 6 inches.
1. To begin cut 2 rectangles from your fabric. My bow tie was 3 ½ by 6 inches.
2. With RIGHT sides together sew the ENTIRE piece together.
3. Clip corners.
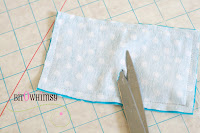
4. Pull up ONE side of fabric and use scissors to snip an opening right in the CENTER. This will be hidden in the end.
5. Using that opening you just created turn your bow right side out.
8. LAYER: 3 ½ inch ribbon, bow (have the snipped side facing you so you can be sure to hide it) and elastic

9. Pinch top and bottom of bow together.
10. Bring ribbon top and bottom together to hold the bow in place.
11. Fold ¼ inch ribbon over.

12. Fold over again so the ribbon is snug around the center of the bow.

13. Hand sew the ribbon into place… try to catch the elastic and the fabric as well to keep it all in place. The ribbon will be thick to sew through so it might be hard to catch the elastic and fabric. If you can’t, don’t worry about it you can use some craft glue to hold the fabric and elastic in place (I stuck the tip of my glue bottle under the ribbon in the back and squeezed some glue in to give it all a good hold.
DONE
Thought I would let you know it also works great as a headband......
Thanks for stopping by! ENJOY


2 comments:
That's such a great tutorial, I love it! Your cute son is such a sport, he even models as a girl :O
Oh how cute! I need to remember this for my nephew! It makes them look like little men! :-)
Post a Comment
Thank you so much for stopping by and leaving a comment :) I love seeing your thoughts!