Thursday, January 27, 2011

Project ReStyle Week 4

 I have finally listed all my up cycled diaper covers after making them MONTHS ago!  You can find them HERE.
I kinda cheated with the last one and used it for my ReStyle this week.  I had a couple rows sew on already so all I needed to do was add the row of roses.  This is my personal favorite of the bunch. I love the colors and that cute fabric.

I am feeling so accomplished :)
We are headed to Utah tomorrow for a visit with the family, a date night without the kids and some shopping.  I am hoping to pick up a few things at the craft store for a few awesome ideas I have jumping around in my head as well as doing some much anticipated thrifting!! I can't wait to get my hands on some junk!
 Have a goodnight and a fun weekend.

Wednesday, January 26, 2011

Felt Flowers & Bum Covers

I made this pretty bouquet of flowers for a friend.  I had to share because I thought it was such a fabulous idea and it can fit into any theme.... "Get Well", "New Baby", "Sympathy", "Birthday", "Anniversary"... and so on.  Also, wouldn't they look SO pretty in red for Valentines Day??!! So many possibilities there. Here is the link for the HOW TO.
I finally took the time to photograph my up cycled diaper covers too!! They will be in the shop soon :)  Hopefully a few tonight after the kiddos are asleep. 
 Yay for their bedtime and my craft time :)

Tuesday, January 25, 2011

It's begining to look a lot like V-Day!

Hi hi!  I just wanted to share some pretties around our house these days. 
Last week I spent about 2 hours searching for a box I thought I had filled with v-day things and found nothing.  Then I was thinking about it and I realized I didn't really decorate last year.  Ha, that was a waste of time. 
So, I have been busy crafting and making decorations for the house.  Next year there WILL be a box filled with pink and red goodness :)  I haven't bought a single thing either... everything was already in my hands!!
 I went with the traditional red, pink and white color palate.  Here is what we have so far..........
We have a big open wall (no clue what you call this space) above our stairs to the basement that I have been using for decorating.  I was totally a copycat inspired by THIS post last year on one of my favorite blogs and stung a bunch of pretties in this space. 
On the Dear Lizzy Blog she directs you to THIS tutorial where you learn how to make the super sweet flower puffs you see here. They are made from coffee filters!!  Also, don't look to closely at my lights... they were from Christmas and were really green and ugly.  I threw some acrylic paint on to get them to blend in better.  I am not too sure how they are going to hold up in the years to come.

I bought a bunch of these blocks 3 years ago.  All they needed was some paint, a little sanding and some letter stickers.  I love it!

I embellished these cute stands with rosette covered Styrofoam balls.  They were super easy.  All you need to do is apply some hot glue directly to your foam ball and roll fabric strips around.  I used and old sheet, satin and some bumpy fabric.  The sheet worked best I think... just so you know :)

I started this little project last year.  I used painted scrapbooking hearts and simply glued some ribbon onto the backs to create my door deco.

Here we have some little hears stuck into our plant that I got last year on sale.. found these babies in the boys room and I am still searching for the white one I got.  The vase will be filled with something, not sure what yet.  I also have a little heart stand that we have been displaying Ryker's valentines in.  He makes them at preschool and brings home like 5 a day ha. 

I put a few lovey dovey scrapbook things out.   I use to be WAY into scrapbooking.  Both the mini book and the page are really old and work perfectly with my theme. 
 I have some red heart doilies and some vintage valentine cards I ordered the other day off Etsy that I can't wait to place around the house.
I hope you liked the peek inside my house and are feeling inspired! I am off to leave about 200 feedbacks on Etsy... yikes!!

Thursday, January 20, 2011

Project ReStyle Week 3

I purchased this sweater from a thrift store because I loved the color.  It has been sitting in my "crap" box for awhile but inspiration hit and I used it for my restyle project this week.  
With a few snips and stitches I created three darling "up cycled" hats!!  All are in size newborn.  I might have to do this more :)
I am sooo in love with these little hats! I decided I will part with them and list them in the shop soon.  Maybe I will get around to listing my up cycled diaper covers too!! Hmmm we shall see!

Wednesday, January 19, 2011

Anthropology Necklace Knockoff

I was browsing Anthropology the other week and spotted a TON of cute things.  Their prices are a little high for my budget but everything is sooo pretty and totally knockoff worthy!
One thing that caught my eye was this necklace. It looked super simple to make... so I did :) This baby has a touch romance to it too, perfect for Valentines Day!

 Anthro Necklace Knockoff Tutorial
Supplies
  • 7 Big beads with big holes
  • Long piece of lightweight, dreamy/whimsical fabric
  • Big needle
Rip a 2 inch strip of fabric as long as you can. 
 My strip wasn't quite long enough so I used 2 strips.

Thread your needle with your fabric.

Tie a knot at one end leaving plenty of room to tie a bow when you are finished. 
I tied two knots, the first one tight and the second more loose and messy (around the first knot).  Thread on a bead and tie another knot.

Continue threading on beads and tying knots. 
When my first strip ran out I tied a knot using my both my new strip end and the one that was getting too short.  I made the knot where I was originally going to place a knot on the necklace and just cut the ends off. Then, I tied a knot over to cover any ends still showing. Whew... make sense??!!
 
When you have finished simply tie a pretty bow and trim the edges. 
I roughed mine up a bit too by picking at the edges for a frayed look.


These only take a few minutes to make and you need no jewelry making tools or skills :)

I had so much fun with the first I made another. 
I should be on a beach when I wear this one.
I hope you enjoyed the tutorial. I saw another one that I am dying to make!  I hate to be a copycat but why not when you can do it yourself?!  Is that bad??  I hope not.
Have a pretty day!
XO

Sunday, January 16, 2011

Because my b.day is coming up.....

My birthday will be here in less than a month!
Here is a little *wish list* I have made for myself :)

This vintage dress would be so SO cute to wear on my special day.  Found on Etsy.

So, I liked these babies so much I kinda already bought them for myself.  Who could resist?! Found here.

Yellow Polka Dot Rain Boots! Found at Target.
IT"S ON SALE!!! I am thinking about making my own if it isn't on my neck in a month.  Found via beautiful Anthropology.

I would love a subscription to this magazine.  They have some super cute ideas. 

I need a new one.  Found here.  Psst.. .this one is on sale too!

This lovely bed set would be such a nice change in the bedroom.  So bright and happy.

Prettiest stinkin shoes I've ever seen! Via Ruche

Wow, I think that was a bad idea.  I am so tempted to go and order a few things... oh no.  

Friday, January 14, 2011

Handmade Gifts Galore

This is way late but I can finally post the handmade gifts I gave this year for Christmas.
Most of the patterns were free on the Internet so I linked back to them for you too see.
This cute owl hat went to my niece.  I LOVE how it turned out.. so cute... I am thinking about making me one.

Using this tutorial I made my mama a laptop case.

My youngest niece got this super sweet "grocery bag" for Christmas.I had so much fun picking out fabric for all the different fruit from my stash. Both the baby and mama loved it.  I got the pattern for this one from a book.

I made these cute clutches with this tutorial for the ladies.  I really adore the blog world and all the amazing free patterns I find!!  Thank you so much bloggers!

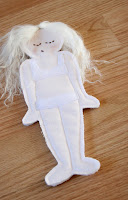
My most favorite gift were these little "Paper Doll" girls.  They are actually made from fabric.
This is where I saw the idea.  I tweaked the pattern a bit to fit my style.
You sew on a Velcro bra and panties to stick the different outfits to!  Genius!  I wish I were a little girl again.

Oh and I just finished this one last night ...
a scarf for the hubs.  I hope you like his "model" pose, he did it just for you.  Ha ha :)
Have a great weekend!  I have a HUGE "To Do" list to work on.

Tuesday, January 11, 2011

Tee to Tote-- A Tutorial

For my Project ReStyle this week I used an old t-shirt my kiddo outgrew.  I turned it into a darling tote bag.  I really love it so I took pictures as I went for a tutorial.  I hope it makes sense... I am not a pro sewer or anything.  Sometimes I have no clue how to word what I do. So, sorry in advance if I am confusing :)
Supplies
  • Size 3T Tee Shirt
  • Fusible Fleece
  • Old Pillow Case
This is what I did....

Cut the tee just under the sleeves and also up one side to make a long rectangle.

Cut a piece of fusible fleece or other fabric stabilizer the same size as your tee.  Iron to the wrong side of your tee to give it stability.  The fleece made mine really thick.

For the top of my bag I used the clean finished edging of an old pillow case... I just cut it apart right by the seem.  You could use a piece of fabric folded in half  to get the same look. 

Place your tee right side up. Lay your fabric strip on top with the unfinished edges lined up with the top edge of your tee (longways). Sew them together.

Open and press that seem.  Now, sew a line or two down the inside of your fabric strip.

Fold the entire piece in half with right sides together and matching up edges.  Sew together leaving the top open.  I ended up rounding off my corners too, just so you know.

For the handles I used the sleeve edges from the tee. I simply hemmed the unfinished edge and sewed them to the bag.  
TA DA!! Done... hopefully if you attempted the tutorial you made it to the end! 
The cutest little tote just for this little guy....
  Ugh, I hate it when he smiles all weird and totally fake-ish.  Silly boy. 


CreativeShareWednesdays


UndertheTableandDreamingUndertheTableandDreaming